
Well… you can! And I’m not just talking about running a simulated robot, I’m talking about turning your own laptop
into a “robot” and run cool stuff on it using our platform.
Here is a video tutorial on how to do it step by step:
Basically, you need to do 3 things:
- Install the Agent
- Define your device in 3D (don’t worry, it is as simple as π)
- Define the robot’s behavior with some cool image processing components (that doesn’t even require a GPU!)
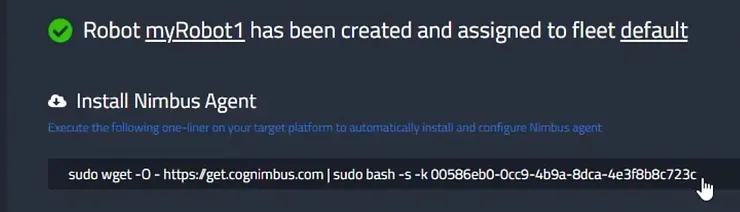
When you add a new robot you’ll get an installation string you can just copy and paste to your Linux terminal and let the platform do all the rest.
When your “robot” is online click on it and go to -> Configuration
Congratulations, you’re at step B!
See how easy it is to build a configuration (01:32 in the tutorial) OR just go to the public configurations and use the one I made for you, look for the configuration: Try Nimbus On Your Laptop Configuration on Hub->Filter by Configurations -> Page 2 -> try_nimbus_on_your_laptop_configuration

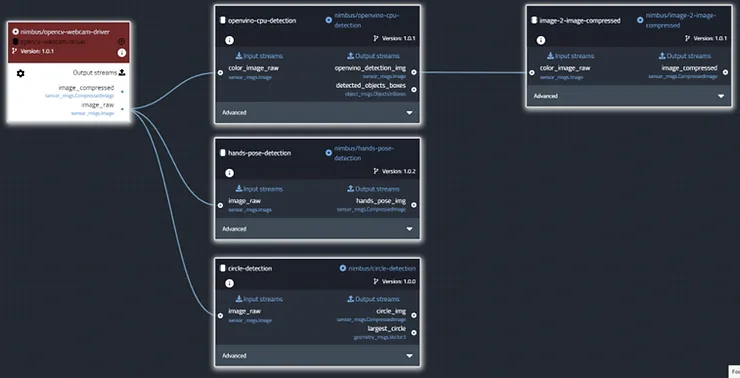
Let’s review the different components and their interactions (see the following figure).
The component in red is the webcam driver. It outputs a raw uncompressed image (image_raw). This output is the input of 3 different components. At the top, you’ll find the openvino-cpu-detection. This component wraps an algorithm that uses a Neural-Network to detect objects. It outputs an image where different objects are labeled with text and bounding boxes. This output is connected to the image-to-image-compressed component that, as you can imagine, compresses the image to reduce bandwidth.
Next is the hands-pose-detection component which outputs an image with hand skeleton recognition. Such components are useful for gesture detection which can communicate different instructions to a robot.
At the bottom, you’ll find the circle-detection component which outputs an image with the biggest circle detected in the image. Such components are useful for tracking items such as balls. You can easily write a behavior that tells the robot to follow a ball or to forage balls etc.
You are ready to have some fun!
Deploy the configuration. Wait for it to install – you can see the progress in the Overview tab of the robot’s dashboard. Now hit the Streams tab and view the different image streams.
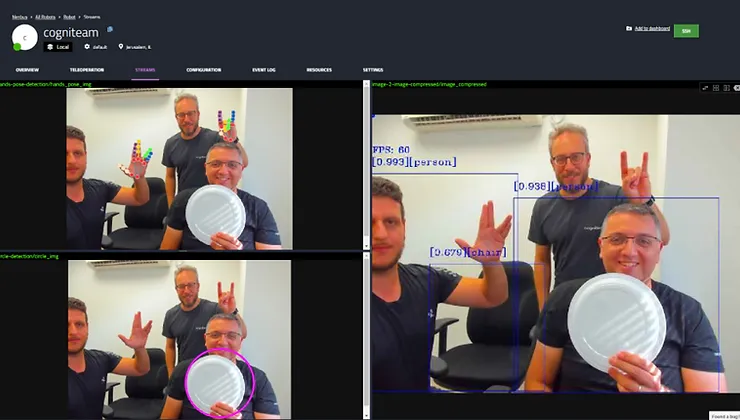
So there you go. You’ve configured the robot, and as you can imagine you can tell the robot to view some gestures that tell it to follow you or to stop and maybe to follow a ball and so on…
Have fun!